Powercore controllers, TEC-10, MPC-10, and MPC-20 have a menu manager application that makes it easy to create new menus or modify existing menus. This makes it easy to use the controller in custom applications.
What is the Purpose of a Menu
The main purpose of a menu is to allow users to select options or change setpoints. The end result is variables will get changed and stored in non-volatile memory. Keep this in mind as you work through this tutorial, all activities surround the primary goal of changing the value of a variable.
Menu Manager Features
- Menu Builder - creates the structure of the menu in a tree format.
- Menu Styles - creates the graphical look of the menu, binds text in the menu to variables, and allows overriding the menu buttons by calling User Events for things like accepting the selected value.
- Actions - Actions are used by User Events to navigate through the menu with button presses, modify values, make and save selections.
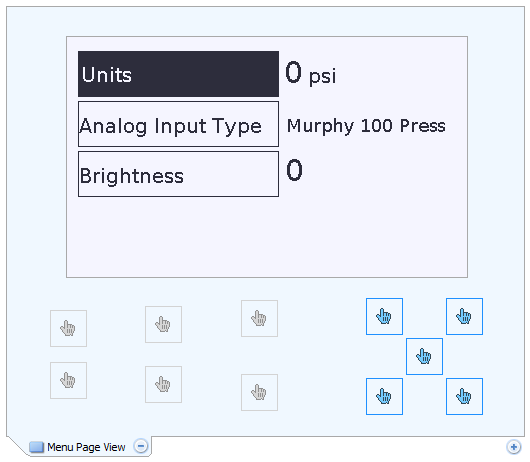
- Menu Widget - this will display the menu as configured by the menu builder with the styles selected for each element. If a menu is built with no styles created then the menu widget will be blank . Only the top level menu items are displayed.
Steps to Build a Menu
- Create enumerated and numeric variables that contain user settings as needed for the application. The Save Value attribute needs to be set to "Survives Power Cycle" in order for it to be stored in non-volatile memory.
- Use the menu style builder to create a style for each type of menu items to be displayed. This includes minimally the main menu, selected view of the main menu, child numeric editor view, and a child enumeration selected view. The selected view will typically be the opposite color scheme of the unselected view or have a cursor indicator.
- Use the menu builder to create the menu tree structure adding child enumerations and child values where needed.
- Assign the menu style to each menu item
- Assign the variables the child menu items are attached to and their min/max and increment values.
- Create User Events for each of the menu Actions that will be used
- Assign User Events to the Buttons reserved for menu navigation
- Add the Menu Widget to the display page and assign it to the root menu
Notes:
- Incrementing/Decrementing a Numeric Value: When the down arrow is used to navigate down into the menu it is assigned the NEXT Action. The next Action also increments the value of variables which is opposite of what you expect when using a down button. Use the Adavanced Inc/dec function and change the direction of the default formula given.
- Saving Variables: Make sure the variable has the "Survives Power Cycle" option selected then call the action MenuVariableAcceptValue. The application will then store this in EEPROM.
- Button Actions: Buttons action assignements are limited in the page designer since the screen view is fixed when viewing the menu widget. Use the Menu Style Next/Previous/Select Override feature to call any special actions needed.
Download Example for TEC-10 created in 2.9.23057
Comments
0 comments
Please sign in to leave a comment.