Now, let’s create a Settings Menu.
The Background
In the Settings Layer, change the name of the Settings Page to: Blank Page
Create a new page and name it: Settings
Drag an Image Widget onto the Settings page
Change the name to: IW Settings Background
Put it in the group: Background
Change Designer Locked to True
Set both the X & Y Positions to 0
Set the Day and Night Image
From the image Library or from the training files (See 1.1 // First Things First), use the image Settings_Background as the Day and Night image.
The Menu Titles
Using a Text Widget, create a Menu Title for:
Brightness (Name it: TW Brightness)
Language (Name it: TW Language)
Simulate Data (Name it: TW Simulate Data)
Viewing Mode (Name it: TW Viewing Mode)
Using a Rectangle Widget, create a selector for each title.
Brightness (Name it: RW Brightness Selector)
Language (Name it: RW Language Selector)
Simulate Data (Name it: RW Sim Data Selector)
Viewing Mode (Name it: RW Viewing Mode Selector)
Make each selector have a:
Height = 3
Start Color of Lime
No Outline
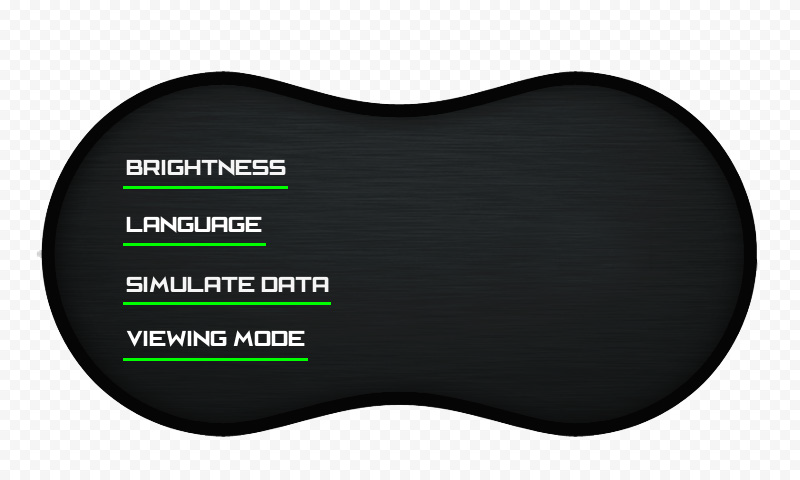
You should have a screen that looks similar to this:
Create Page Views for Each Menu Setting
We will have the Brightness Menu be the default view when the Settings Menu is accessed.
Change the Current View (above the design area) to: Default Settings View_Brightness
Right Click on the tab Default Settings View_Brightness (at the bottom left of the design area)
Select Duplicate View
In the new tab / Page View you just created, change the Current View (above the design area) to: Language
Repeat to create a new Page View for:
Simulate Data
Viewing Mode
You should have 4 tabs / Page Views at the bottom of your design area like this:

Develop Each Menu’s Page View
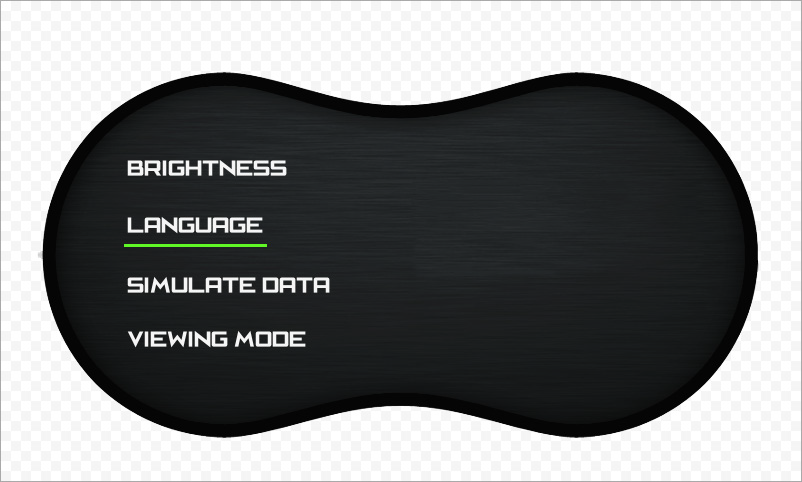
Select the Tab / Page View for Default Settings View_Brightness
Select the RW Brightness Selector
In the properties menu under the Show In View section, change to only show in
Default Settings View_Brightness
Repeat this process so that each Menu’s page view has the appropriate selector (green underline) beneath it.
When you are done, you should have Page Views that look similar to these:
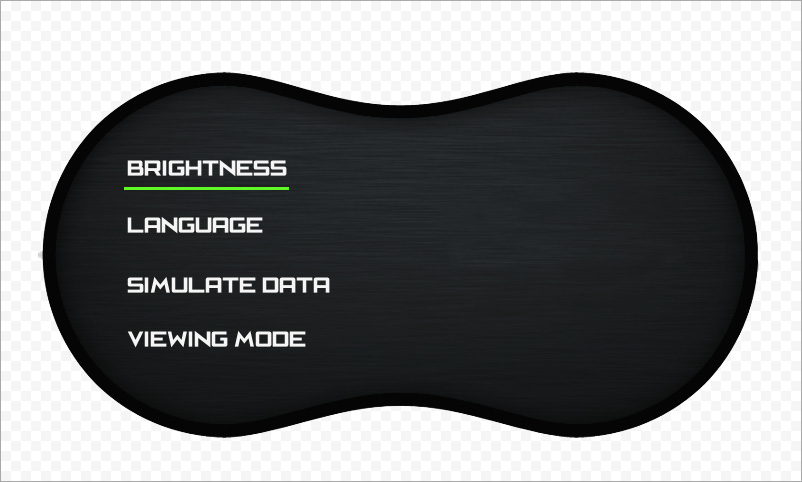
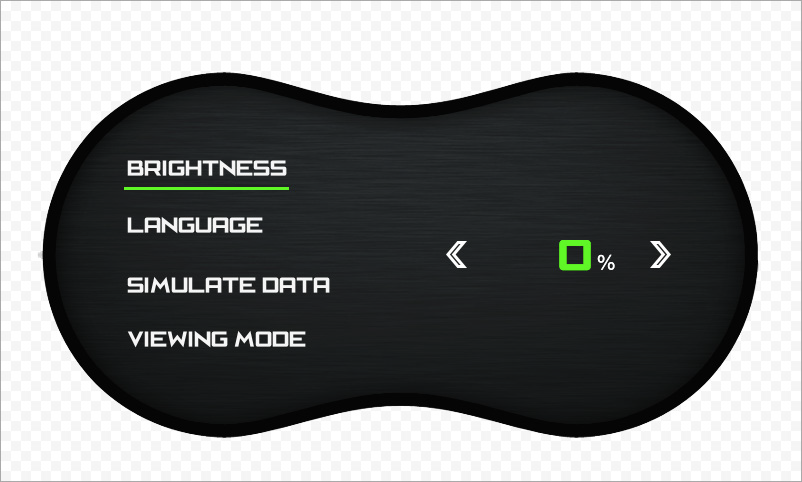
Brightness Menu
Select the Tab / Page View for Default Settings View_Brightness
Add a Smart Text Gauge to your screen
Name it: STG Brightness
Put it in the Brightness Group
Edit Smart Data Items

For the Selector Variable select Day/Night (note that the Auto Create box is not checked)
Click OK
Add Left & Right Arrows from Image Library
Change the STG Brightness properties so that you have a page that looks similar to this:
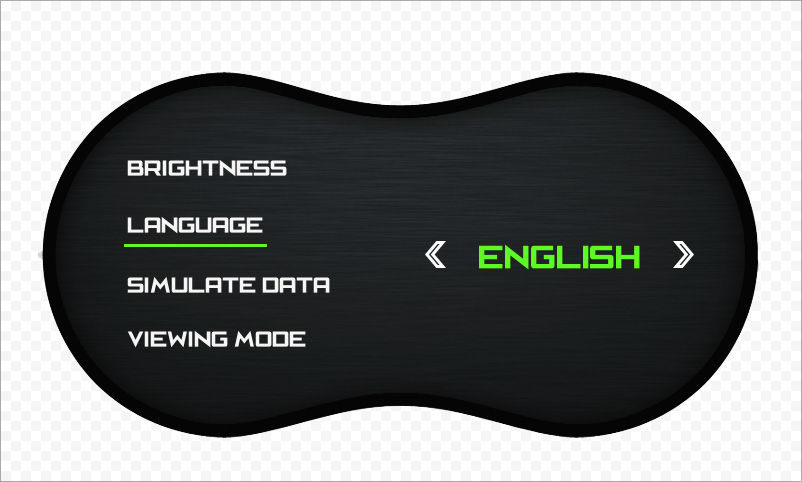
Language Menu
Select the Tab / Page View for Language
Click and Drag a Smart Text Widget onto the screen
Name it: STW Language
Put it in the Language Group
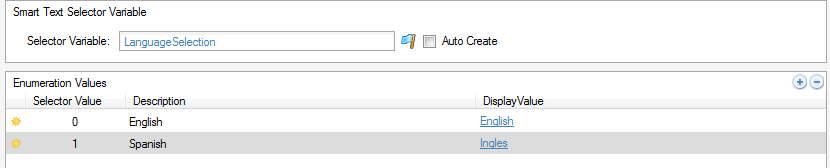
Edit Smart Data Items
For the Selector Variable select LanguageSelection (note that the Auto Create box is not checked)
Click OK
Click the +
Input the Enumeration Values as follows:
Add Left & Right Arrows from Image Library
Change the STW Language properties so that
you have a page that looks similar to this:
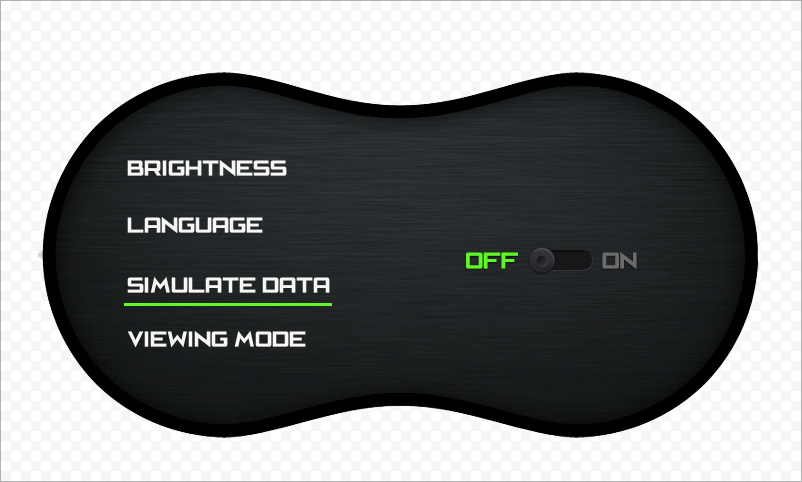
Simulate Data Menu
Click and Drag a Smart Image Widget onto the screen
Name this widget: SIW SimData
Put it in the Simulate Data Group
For the Selector Variable select SettingSimData (Note that the Auto Create box is not checked)
Click the +
Create the image list as follows:

Use images Switch On and Switch Off from the training files (See 1.1 // First Things First)
Click OK
When you are done, you should have a Page View that looks similar to this:
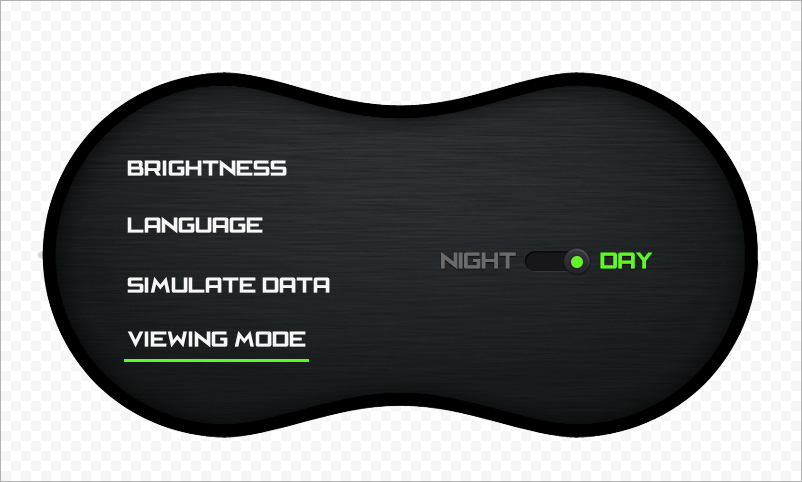
Viewing Mode Menu
Click and Drag a Smart Image Widget onto the screen
Name this widget: SIW Viewing Mode
Put it in the Viewing Mode Group
For the Selector Variable select Day/Night (Note that the Auto Create box is not checked)
Click the +
Create the image list as follows:
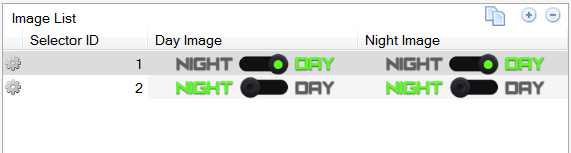
Use images Day On and Night On from the training files (See 1.1 // First Things First)
Click OK
When you are done, you should have a Page View that looks similar to this: