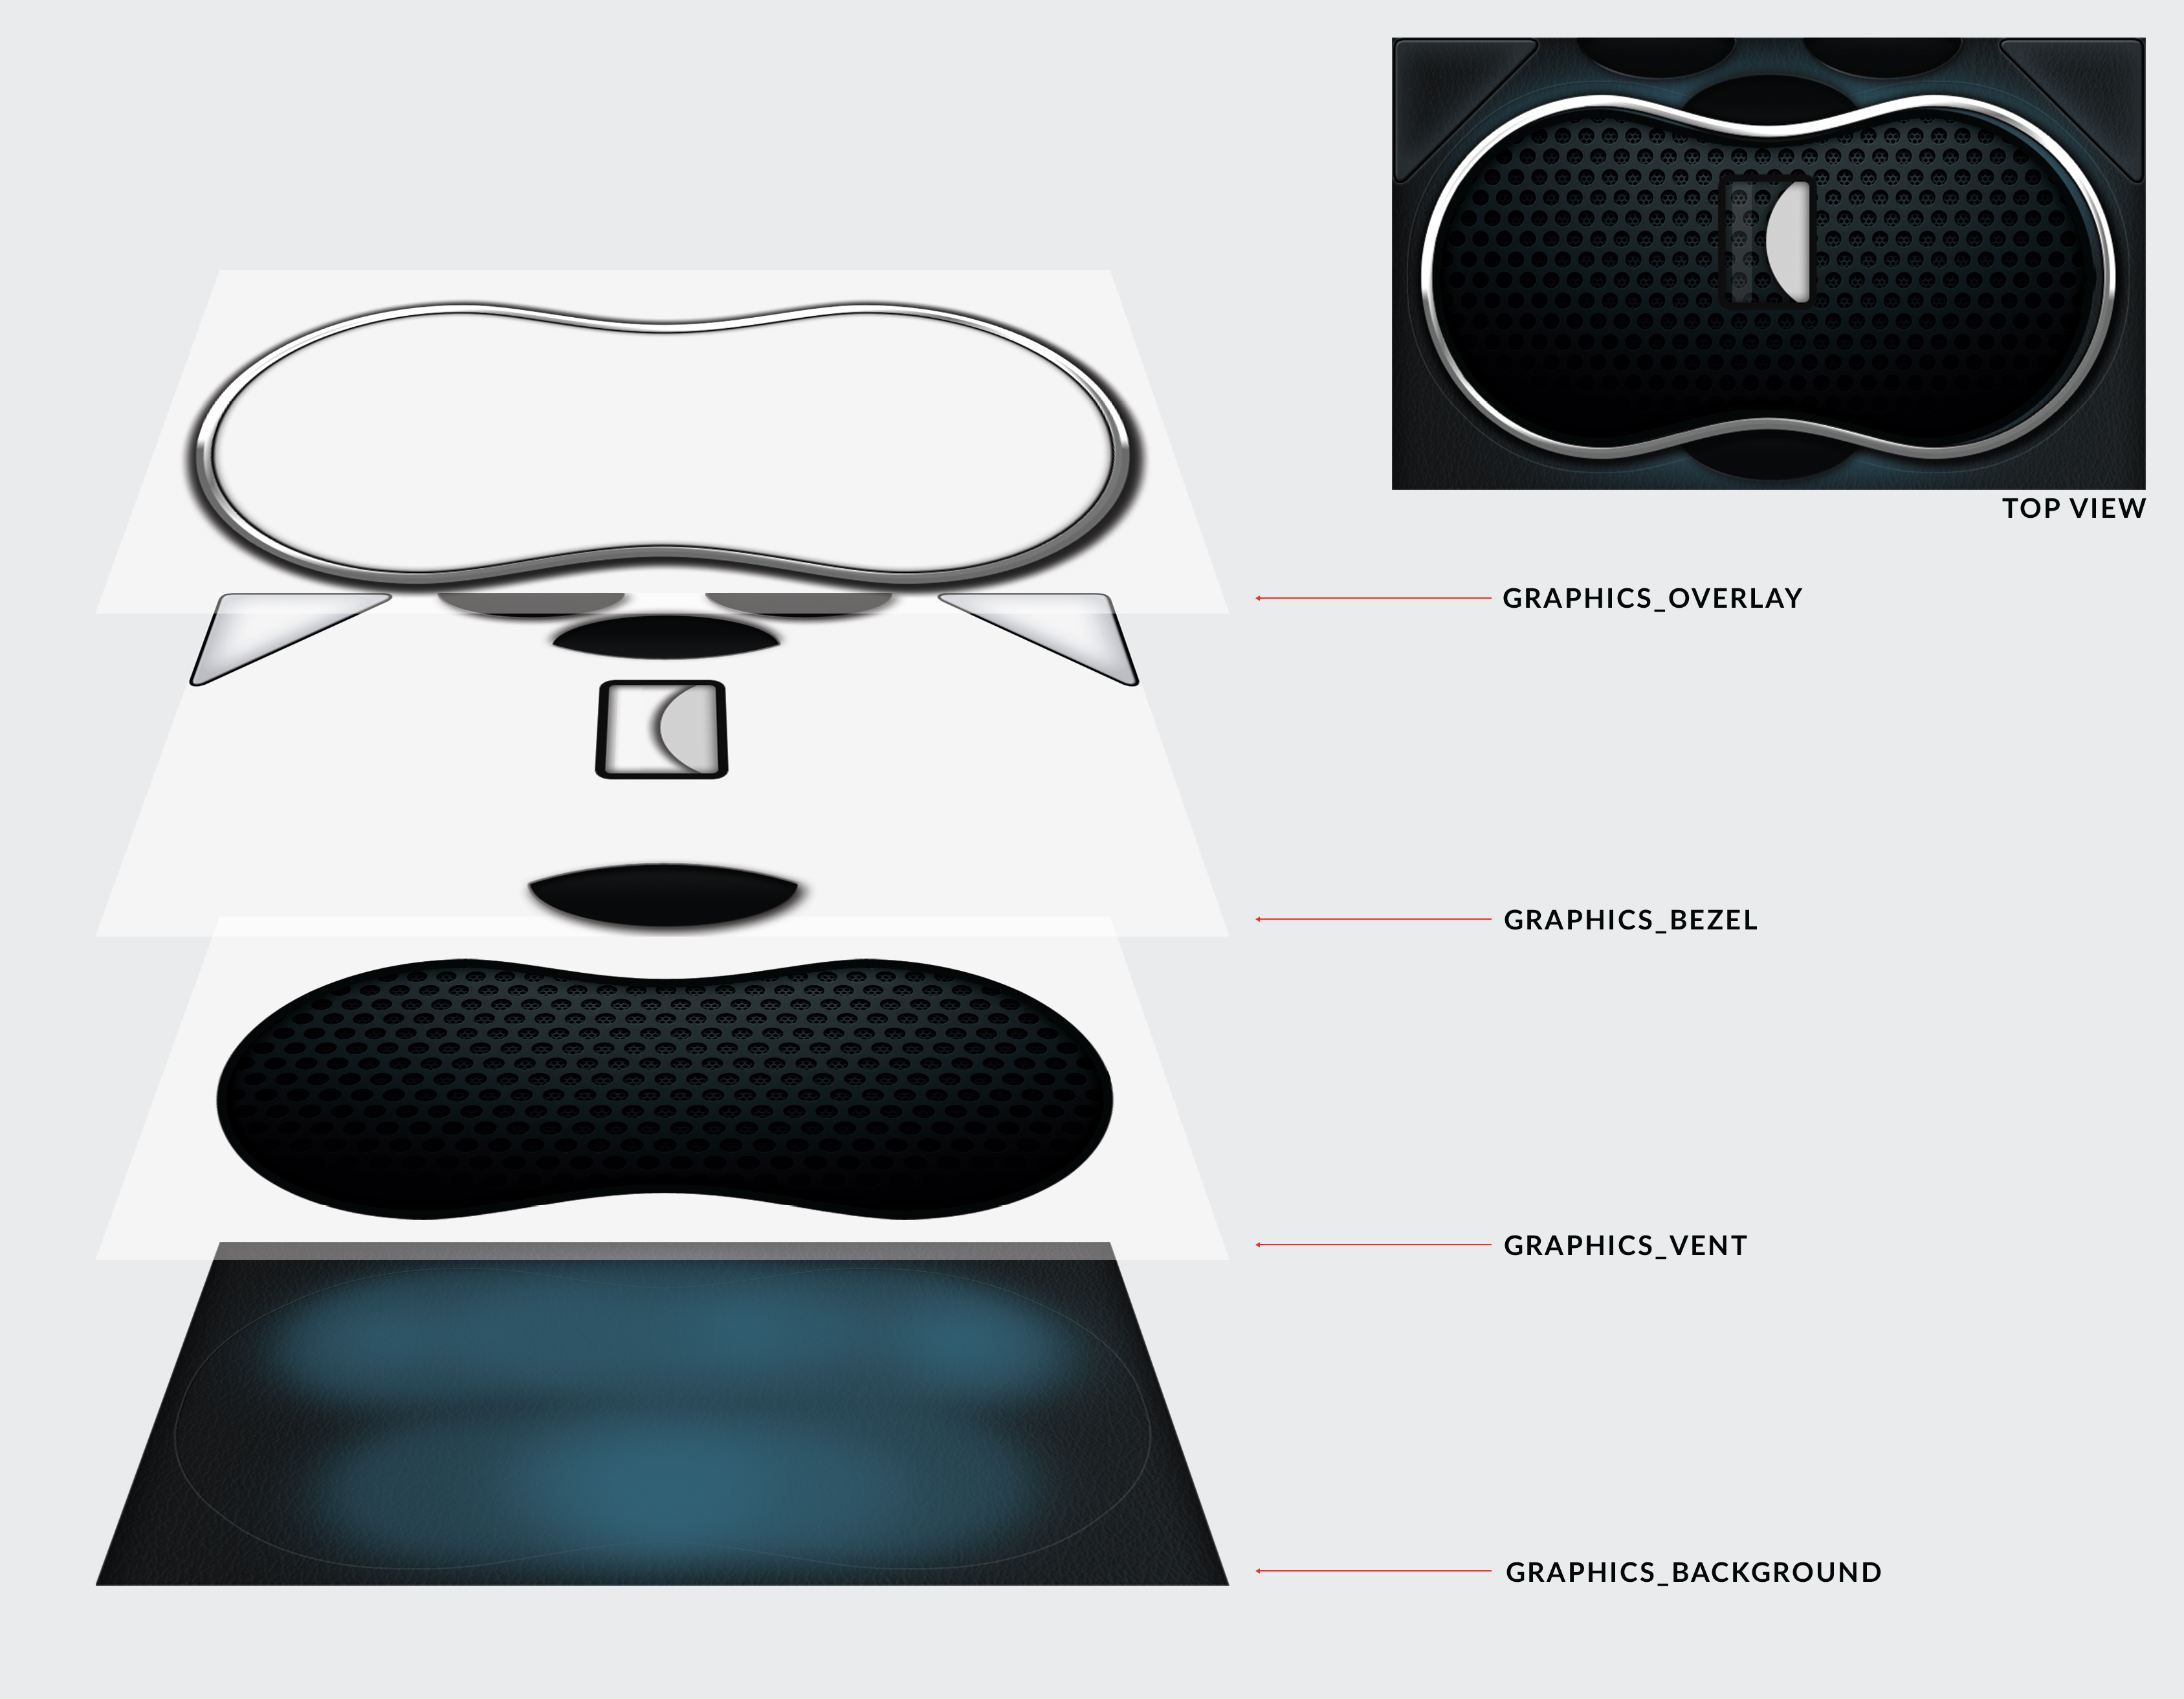
Background Layer 1
From the Toolbox tab, drag an Image widget onto the design area
Name this Image Widget: IW Background
Change the Group Name to: Backgrounds
For the Day & Night Image use image, Graphics_Background
Change your X & Y Position
X Position: 0
Y Position: 0
Select Designer Locked to True
Background Layer 2
From the Toolbox tab, drag an Image widget onto the design area
Name this Image Widget: IW Vent Background
Change the Group Name to: Backgrounds
For the Day & Night Image use image Graphics_Vent
Change your X & Y Position
X Position: 0
Y Position: 0
Select Designer Locked to True
Background Layer 3
From the Toolbox tab, drag an Image widget onto the design area
Name this Image Widget: IW Overlay
Change the Group Name to: Backgrounds
For the Day & Night Image use image Graphics_Overlay
Change your X & Y Position
X Position: 0
Y Position: 0
Select Designer Locked to True
Background Layer 4
From the Toolbox tab, drag an Image widget onto the design area
Name this Image Widget: IW Bezel
Change the Group Name to: Backgrounds
For the Day & Night Image use image Graphics_Bezel
Change your X & Y Position
X Position: 0
Y Position: 0
Select Designer Locked to True
When you are done, your screen should look like this:

Now let’s start building some gauges. On this screen we will be monitoring:
• Engine Speed
• Vehicular Speed
• Oil Pressure
• Oil Temperature
• Engine Coolant Temperature
• Battery Voltage
• Fuel Level
• Engine Hours
You will need to go to the Connections Tab and add J1939 parameters for Vehicular Speed, Engine Oil Temperature and Engine Hours (ref. Section 2.3)
Monitoring Engine RPM
We will be using multiple gauges and widgets to make this gauge: a Rotary Gauge, Curved Bar Gauge, Text Gauge and Text Widgets (x2). Look at the picture here and see if you can do this on your own. Use the applicable supplementals if you need help.

1. Rotary Gauge
Click on the Toolbox tab
Click and drag a Rotary Gauge onto your screen
Using Supplemental 3.3.1, change the Rotary Gauge Properties
2. Curved Bar Gauge
Click on the Toolbox tab
Click and drag a Curved Bar Gauge onto your screen
Using Supplemental 3.3.2, change the Text Widget Properties
3. Text Gauge
Click on the Toolbox tab
Click and drag a Text Gauge onto your screen
Using Supplemental 3.3.3, change the Text Gauge Properties
Don’t forget the Text Widgets…
Use Supplemental 3.3.4, and 3.3.5 to change the Text Widget Properties
Supplemental 3.3.1


Supplemental 3.3.2

Supplemental 3.3.3


Supplemental 3.3.4

Supplemental 3.3.5

Monitoring Vehicular Speed
We will be using a Text Gauge and Text Widget to monitor Wheel Based Vehicle Speed. Look at the picture here and see if you can do this on your own. Use the applicable supplementals if you need help.

1. Text Gauge
Click on the Toolbox tab
Click and drag a Text Gauge onto your screen
Using Supplemental 3.3.6, change the Text Gauge Properties
Don’t forget the Text Widget…
Use Supplemental 3.3.7
Monitoring Engine Hours
We will be using a Text Gauge to monitor Engine Hours.
Click and drag a Text Gauge onto your screen
Using Supplemental 3.3.8, change the Text Gauge Properties
Supplemental 3.3.9

